
Using your heat press to become a confident and capable apparel decorator means following the best practices when it comes to heat application. The garments you create represent your business, so it’s important to offer quality items that will last. There are so many things to consider when heat pressing, but the top heat printers all follow the same recipe for success.
If you’ve ever had trouble getting a transfer to stick, or have experienced transfers lifting after a few washes, don’t worry! We’ve got you covered. Issues often arise because you weren’t properly prepared at the start. Before you heat press anything, follow these tips to ensure the best possible outcome and prevent application failures.
Fabric
The first step in a successful heat press application is confirming the fabric composition of your garment– is it cotton, polyester, nylon, tri-blend, etc.? Being aware of the fabric is critical to using the right type of heat transfer material. If the material’s adhesive isn’t designed for the fabric you’re working with, you’ll run into trouble quickly. Choose a material transfer type that’s compatible with the fabric so you can guarantee adhesion. Our Material & Fabric Selection Chart will help you determine the best material for your garment.


Pre-Heating
The most common mistake heat printers make is skipping the preheat process. Because garments are made of fabric, they often contain moisture, which can cause heat application issues. The moisture needs to be released to get a good bond of the adhesive to the fabric. This is especially true when the garment contains cotton.
Before pressing your first item, make sure to preheat the lower heat press platen for about 30 seconds to ensure it’s warmed up. To do this, once the heat press reaches the desired temperature and without anything else on the platen, simply close the press like you normally would. Repeat this anytime you load a new platen onto the machine.
A good rule of thumb is to preheat every garment for 3-5 seconds. Consider preheating a few seconds longer for heavier weight garments such as hoodies and fleece. Keep in mind, with heat sensitive fabrics such as polyester, the key to avoid scorching is to keep the preheat time to a minimum.

Time
Don’t make the mistake of overlooking application time. It’s a critical step in the heat printing process. When you’re busy or have a large order, it may be tempting to save some time and heat press just long enough to get the material to adhere to the fabric.
Like baking, heat pressing follows a specific recipe for success. You wouldn’t take a cake out of the oven before it’s finished, right? The same is true for heat pressing. Time allows the adhesive to properly join with the fabric, ensuring the longevity of the bond. Always follow the recommended time setting for the heat transfer or material you’re applying.
Temperature
This one might seem like a no-brainer, but you’d be surprised how often inaccurate temperature is the culprit for failing transfers. You always want to make sure you’re following the application instructions for the specific material you’re applying.
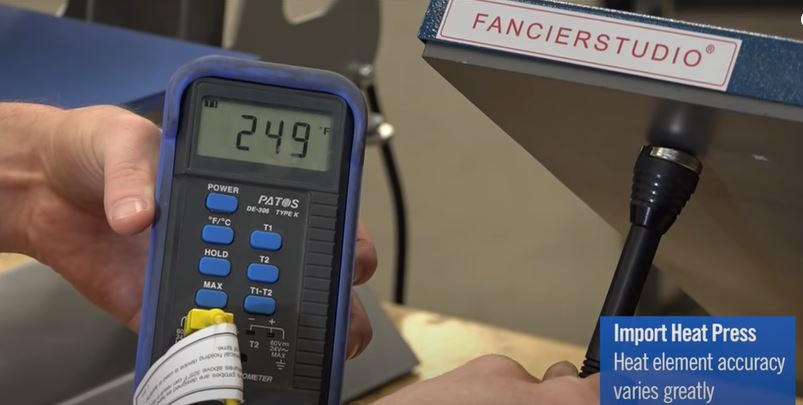
Most temperature issues are due to an inaccurate heat press. This can show up immediately or in the middle of a larger job. The heat press can gradually lose heat after each application, not recovering enough due to the thin platen and lower quality connections between the probe and control board. This is very common on inexpensive machines.
So, how do you test the temperature on your heat press? Many people will suggest a temperature gun—but this is not an accurate device. We recommend temperature strips or a high temperature probe for an accurate reading.

It’s a good idea to check that what the control board is displaying is accurate. When the heat press is on and set to the desired temperature, and after you’ve applied some shirts, you should check your press in the middle of a job to ensure it isn’t losing temperature. This is a great measure of quality control for your orders and heat press. It’s a good habit to get into and you’ll know if your press is having issues keeping up.
Simply increasing the temperature by 10 degrees is not an effective long-term approach to compensating for an inaccurate heat press. The best solution is investing in a high quality, accurate heat press for consistent results. A heat press is the most important machine for an apparel decorating business, so don’t cut corners when it comes to your equipment.
Pressure
Inaccurate pressure is where the majority of applications fail, and it is primarily due to user error. It may look like your transfer is sticking and properly adhered to the fabric; however, after a wash cycle the material will most likely fall off.
Before we explore potential areas for user error, let’s first ensure your heat press is performing properly. With the press turned off, place the flat edge of a ruler against your upper heating element. Then, check there are no gaps or warps in your platen that could drop-outs in pressure.

After you’ve checked your heating element, let’s explore the loading of your item for application and the placement of your transfer. Loading your garment on a flat, even platen is crucial to ensuring a perfect press.
When the garment is on the heat press, if your machine allows it, ensure there are no seams, collars, zippers, buttons, or other raised obstructions on your heat press surface. These can impede pressure and cause application and durability issues.
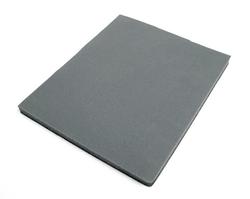
Many companies recommend inserting a pillow or mousepad into your item to achieve a flat surface. This is an effective technique but please note the differences between a pillow and a pad:
- Heat Press Pads have a medium to firm density and allow the application to achieve firm pressure if required.
- Invest in Heat Printing Pillows to absorb buttons, seams, or zippers for more even pressure. Because they’re low density, don’t use them with firm pressure applications such as screen printed transfers.

If you have to apply a design close to a seam or even over a seam, the pillow is helpful because the seam will sink into the pillow allowing for an even surface. Remember, though, you will not be able to achieve a firm pressure with pillows. If you’re decorating a unique are that requires a heat printing pillow, select a transfer that works with a light or medium pressure. Whichever accessory you choose, set the pressure on the machine with the pillow or pad inserted into the garment.
The question often arises, ‘How do I know what pressure I’m achieving on the press?” While many will present tricks to measure this, all of them fall short in some way. For this reason, we can only recommend investing in a heat press that has a digital pressure readout. Otherwise, it is better to err on the side of firmer pressure.
Heat Press for Success
It’s time to start heat pressing with confidence! If you follow the heat pressing tips in this post, you can be sure the garments you’re delivering to your customers won’t come back due to failing transfers. Time, temperature, and pressure are your allies when heat printing, so remember to follow these three crucial elements for success. Also, always choose materials that are compatible with your fabric and don’t forget to pre-heat!
For more tips, check out our 5 Tips for Heat Printing Success post. Happy Heat Pressing!

I have an A2Z swing away press (had it for almost a year) and suddenly it has started to scorch lighter shirts. I am using the exact same shirts I have always used and the exact same setting on the press. I have bought a heat temperature gun and it is reading 20° lower than what the press screen is showing. Any ideas or tips
Hi Kaylee, it sounds like there may be an issue with the temperature reading. Please contact us for assistance, you can reach our Hotronix heat press technicians at 800-727-8520 or filling out a contact form here – https://www.hotronix.com/contactus. Thanks!
what’s the best heat press to start a t shirt business
Hi Myranda! We have a variety of heat presses available for all budgets and production levels. If you’re looking for a good option to start, check out our blog post: Best Start-Up Heat Press Package.