Fit more designs on transfer paper by expanding your print area.
By Juliet Kalmeta, Technical Support Specialist

When using the Print/Cut workflow in the Roland® DG Cut Studio™ software, the page margins may be too large for you to fit your design(s) within the crop marks. If you need to make the page margins smaller so you have a larger distance between the crop marks, I found the following steps work best:
InkTra™ Opaque Inkjet Transfer Paper is the only transfer paper on a carrier. This is necessary to feed the paper through the cutter and have the blade only cut the paper itself, keeping it on its carrier so it does not jam the paper inside the machine (similar to cutting a piece of CAD-CUT™ material).
8.5” x 11” InkTra™ Opaque Inkjet Transfer Paper
- First make sure you have the Print/Cut workflow enabled by selecting File > Print & Cut
- Select File > Printing Setup. You will see the Printing Setup window appear.
- In the Margins boxes (Top, Bottom, Left, Right) type in .5 inches
- In both of the Crop marks boxes (W=width and L=length) type in 7 inches for the width and 9.5 inches in the length.
11” x 17” InkTra™ Opaque Inkjet Transfer Paper
- First make sure you have the Print/Cut workflow enabled by selecting File > Print & Cut
- Select File > Printing Setup. You will see the Printing Setup window appear.
- Select Set up the printer
- Change the Paper size to 11 x 17
- In all of the Margins boxes (Top, Bottom, Left, Right) type in .5 inches
- In both of the Crop marks boxes (W=width and L=length) type in 9.5 inches for the width and 15.5 inches in the length.
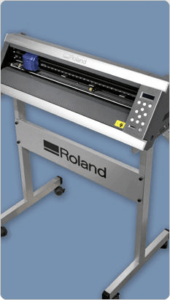
You will see the crop marks spread farther apart on the grid page. Please keep in mind that you only have a half inch to fit the pinch wheel of the Roland® DG GX24 onto the edges of the transfer paper. The pinch wheels cannot fall into the path of the crop mark printed on the page. A straight alignment and the pinch wheels as far to the edge of the paper is necessary so the optical eye can see the crop marks printed on the page.
Editor’s Note: If you need additional help working with your GX-24 or your drawing and cutting

Roland GX 24 print & cut. With printed material with crop marks loaded in the Roland cutter the optical eye is not always reading the crop marks I have to click on cutting two or three times to get the optical eye to read the crop marks. When the crop marks are read the cutting operation stops and will not proceed with the cutting operation. I have restarted the computer, restarted the cutter, and ran the setup software supplied by the manufacturer with no luck. Can you help me?
Yes, Philip. If you call Stahls’ customer service at 888.4.STAHLS from 8 am to 7 pm EST, one of our representatives should be able to help.
Does anyone have problems with the color of the print not matching the color that is on the screen of the computer? Also I am having problems getting the colors to come out bright. Every transfer looks faded or muted in color. I would appreciate any advice I can get this has become a real issue. My customers are not accepting the transfers and I have spent hours trying different settings and printing them and coming up with the same result. My blacks are not a deep dark black they look like charcoal and I have new ink catridges in all cmyk colors. I have cleaned the print heads several times but it does not seem to make a difference. I have the Roland G24 VersaStudio.
Hi Debbie,
For help with your transfer paper issues, contact Stahls’ Transfer Paper Experts at 800.833.3432. It will be helpful if you can tell them what kind and brand of transfer paper you are using, as well as what kind of printer, ink, and software.
hello my name is kelly and i have a roland pnc950 vinyl cutter and i cant seem to get it to cut .
everytime i turn it on and hit setup it starts to measure the paper size then continues to measure further than it can . i get a wierd sound and it starts flashing the error lights . not sure how to fix this issue please
Please email qe@stahls.com to get assistance with this issue.