by Danielle Petroskey, Marketing
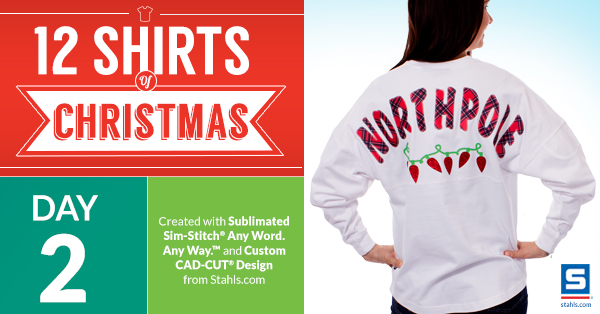

On the second shirt of Christmas, we printed North Pole Plaid Text with Light String
We love Santa and everything else about the North Pole! Which is why we were so excited about finding this website aptly called Northpole.com. You can learn all about the goings on at Santa’s workshop, play games at the Elf Clubhouse, find recipes in Mrs. Claus’ kitchen, check out the weather station, read about adventures at the Reindeer barn, and more!
For your customers who are all about supporting Team North Pole, this billboard crew shirt is for them! The bonus of this fan wear piece is that it was created with sublimated SimStitch®. Santa’s elves love it because they can achieve the look of sewn appliqué without sewing a stitch! (They love saving time on creating these, so they have more time to participate in reindeer games).
While there are six pattern design choices and over one hundred color options, our elves decided to go with some traditional colors for the holiday. To jazz the shirt up a bit, they decided to add some fun festive sparkle with the string of lights.
Here’s how they created this one:

Items used:
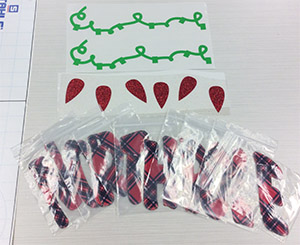
Design: North Pole
Product: Sublimated Sim-Stitch® Any Word. Any Way. ™
Pattern: Plaid
Colors: Red, Black, and White
Font: Marker (block style) – all uppercase letters
Design: String of lights:
Product: Custom CAD-CUT® Design
Heat Transfer Materials/Colors: Fashion-FILM® in Matte Apple Green (string)
Glitter Flake™ in Red (lights)
**Note these two designs will need to be applied separately – see application instructions below.
Tools Needed:
Garment: Billboard crew shirt (aka spirit shirt)
Heat Press Application Instructions:
1. Lay out the individual Sublimated SimStitch letters on the arc or straight lines on the lettering layout guide as desired.
2. Cover the letters with the high tack Magic Mask® strips (included with the lettering layout guide); this will act as a carrier for transferring your lettering to the garment.
![]()


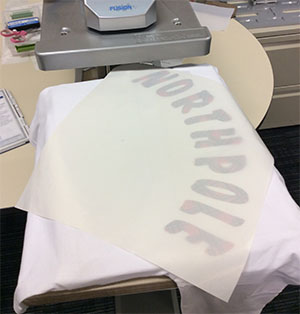
3. Insert a heat printing pillow inside the garment- this will help create even pressure when applying to garments with heavy seams.
4. Preheat your garment for 10 seconds; this helps remove moisture and wrinkles
5. Position the letters on the garment, adhesive side down
6. Cover with a non-stick cover sheet, making sure all designs/lettering are covered
![]()
7. Heat apply for 20 seconds
8. Position the Custom CAD-CUT Design on the garment, adhesive side down
9. Cover with a non-stick cover sheet, making sure all designs/lettering are covered
10. Heat apply for 20 seconds
11. Peel HOT
![]()
![]()
